
Wooden Fence Installation In Elkhart, Indiana
Elkhart Fencing Company offers homeowners and businesses in Elkhart, IN professional fence maintenance and installation. Some of the services we provide include cedar fence installation, dog fence installation, fence repair, metal gate installation among others. We have over twenty years’ experience in this field. Here is how we carry out wood fence installation.
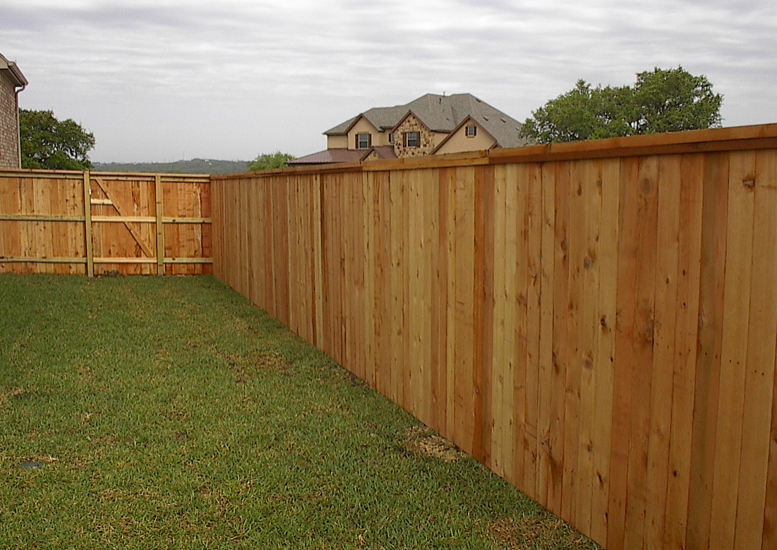
How to Install Wood Fence Panels Installing wood fence is a right way of adding additional security to your home. We at Elkhart are specialized in installation of the wood face panels. Our professional team first gathers the essential tools and equipment before embarking on the actual work. We start by preparing the posts. Before the wooden fence is installed, it is necessary to have sturdy posts in place. After ensuring that the posts are in place, we then install the panels. We guarantee that the boards are an inch above the ground before fixing them. We then fasten the panels using galvanized nails. The team also leaves a room in case the client needs a gate installation after that. To prevent the boards from exposure to snow and rain, we always stain them. |

|
How to Build a Wooden Fence Step By Step
Building a wooden fence requires the ideal wood; therefore, the first step is to select the desired materials for building. Everyone needs a fence that will last for over ten years. The next step is deciding on the best style to use. Some of the styles to use include concave, lattice, picket, board on board, among several others. Afterward, we determine where your fence will pass through. Elkhart has a team of surveyors to help in marking the ideal line of the fence. The next step is determining the height of the fence. For a privacy fence, a six feet fence is excellent. We then set up the corner posts followed by the middle posts. The middle post and corner posts are placed at a distance of about eight feet. After setting up the posts, the supporting boards are then fixed. A rail may also be used in place of supporting boards. With the support boards in place, the next step is adding the privacy boards. There are of different styles depending on the taste of the client. The last step is treating the boards.
How to Build a Wood Privacy Fence
Building a wood privacy fence is a walk in the park if you hire the services of Elkhart Fencing Company. Here is how we will construct this type of fence for you. First, we establish the first line. Second, we mark the location of the post. The ideal space between posts is eight feet along the fence line. The next step is to dig the post holes, preferably 2 feet deep. Another step is to determine the height of the posts. On the holes, we then place posts and fill up them with a mixture of concrete. After ensuring that the posts are firm, we fix rails on them. We usually use pressure treated wooden rails. The next step is attaching the end fence boards to the rails. We then determine the desired height of the fence board height and connect the fence board accordingly along the rails. The last step is treating the fence.
Building a Fence for Dummies
Almost every homestead deserves to have a fence. We at Elkhart offer essential tips on how to construct a fence for dummies as follows. If you are a dummy, you will first need the measurements of the yard to be fenced. Then, buy the necessary materials. The next step is digging the holes, where the posts will be placed. Install the post on these holes after that. The next step is to install a gate at a desirable location. The last step is to hang the fence.
Wood Fencing Materials
When setting up a wood fence, you will need various materials as listed below.• A concrete mixer• Mason line and exterior screws• A gate hardware kit• The pressure treated or cedar fence pickets• The fasteners for pickets; these include nails, staples or screws• Pressure treated posts (probably 4 X 4)• Pressure treated lumber (2 X 4)• Furring strips (1 X 4)
How to Install Cedar Fence Panels
Just like other fence installation above, we follow the same process when installing the cedar fence panels.
How to Install Wood Fence Panels on Uneven Ground
Contours and slopes add beauty to a yard. However, they add problems when one decides to fence the area. Installing a fence on an uneven slope is an uphill battle. But don’t worry again because Elkhart is here to solve you this menace.
First, if the area to be fenced has slight slopes, we usually ignore the features and continue with the fencing process. The effect will be noticeable if the slopes are not extensive. If the area to be fenced contains significant slopes, we usually use stepped panels. The stepped fence panels enable the fence to follow the grade thus allowing the fence to be consistent. With this type of design, every panel of the fence between the posts is set lower or higher than that next to it.
Another option is utilizing rackable panels. These fence panels are designed to adjust to uneven slopes since they assume the shape of a parallelogram rather than that of a rectangle. It enables the bottom and top part of the fence rails to run concurrently to the grade.
Elkhart Fencing also uses custom fences on the uneven grounds. These custom fences are designed to suit the slope of your ground. However, they are quite expensive.
Fence Installation Cost Per Foot
The installation cost of fence varies depending on the specific company. It also depends on the material and style to be used.